 The Turn in the Road
 The Turn in the Road
Turn In The Road - Key Points
Phase 1
PREPARE - select first gear - find the bite - handbrake ready.
OBSERVE - look all round.
MOVE - time the move off with the handbrake release.
Full right lock once you begin to move forward.
Keep looking up the road and down the road.
Once you are passed the crown of the road - be ready to brake if the camber affects our speed.
3ft from the kerb counter steering to prepare for next phase.
Brake gently to halt about one foot from the kerb.
Phase 2.
Prepare - Observe - Move (Don't begin to move until you are looking in the direction of travel - to the rear).
Camber may make this an uphill start - do we need more revs?
Full lock as soon as we are moving and then hold the position.
Keep looking mainly in the direction of travel but also looking up and down the road.
Remember the camber effect - do we need the brake to help control the speed.
3 feet from the kerb counter steer and brake gently to a halt about 1foot from the kerb.
Handbrake on and select neutral.
Phase 3.
Prepare - Observe - Move
Have you got enough room to make the turn.
This will be another uphill start.
Move slowly forward and take up the norma driving position on the other side of the road.

Reversing and manoeuvring skills are not difficult but they do take practice to master.
When you learn how to do the turn in the road you will only be using skills that you have previously learnt and applying them to a new situation.
Don't worry if it seems complicated when you read this tutorial for the first time – it is easier to understand once you have experienced it in the car.
Turn in the Road - The effect of Camber
Although the road surface usually appears flat, most roads have a curved surface with the highest point being in the centre of the road. ![]()
This could affect you during this manoeuvre because it means you will be moving off on a slight uphill gradient when completing phases 2 and 3 of the manoeuvre
Remember this will require you to set a little more gas and the biting point will be a little higher than normal.
You will also need to take care to co-ordinate the release of the handbrake to ensure a smooth move off.
Turn in the Road - Speed Control
The key to success when manoeuvring in a confined area in first or reverse gear is maintaining strict control over our speed use of the clutch and brake if necessary. We will then have plenty of time to make the checks and observations that have to be carried out.
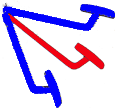
Try to imagine the clutch pedals' position being related to a scale - when the clutch is pushed fully to the floor it is in position 1 and when it is fully released it is in position 10. You will find the bite is at about position 5.
In normal driving we find bite and then bring the clutch up slowly to position 6 then 7 and eight - up to position 10 and then take our foot away.
To maintain strict control and ensure we only move very slowly when manoeuvring in 1st or reverse gear we find the bite as normal then bring the clutch up only a very small amount (to about position 5 1/2. If the vehicle picks up speed then we would push the clutch in slightly to about position 4. The distance between 4 and 5 and 5 and 6 is only very small - about the thickness of a 50p piece.
When we push the clutch in to slow down and it doesn't have the desired effect then we should use the brake - because we are only moving very slowly a very light pressure is all that will be needed.
Accuracy.
During the manoeuvre we must try to avoid hitting the kerb - it will help to make an initial judgement of your position when moving forward by remembering that the offside wheel which will be nearest the kerb is under the gas pedal.
When reversing we need to judge our distance from the kerb relative to whichever wheel is nearest to the kerb -generally the offside rear wheel which is located under the back of the rear passenger seat.
.
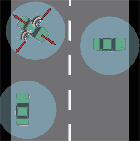
Throughout the manoeuvre we must be making effective observations.
This means checking all round including the blind spots before moving off at the start of each phase and continue checking whilst we're moving.
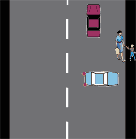
We'll be looking for pedestrians as well as other vehicles - if there was a vehicle approaching or a pedestrian wishing to use the road before the start of any phase we would pause and let them pass.
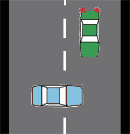
If a vehicle approached whilst we are on the move we would be aware of them and complete the phase and then wait for them to proceed.
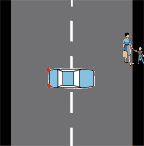
If we were travelling across the road towards the kerb and a pedestrian was nearby we would pause to let them get clear before completing that phase.
The Turn in the Road - Steering.
There is always a temptation to begin steering before we start moving - this is known as "dry steering" and it can cause damage to the steering mechanism and must be avoided. If you control your speed properly throughout the manoeuvre there will be plenty of time to steer effectively - dry steering is not necessary.
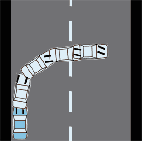
Throughout the manoeuvre we need to make large movements of the steering wheel and move it as quickly as possible to be able to compete the turn successfully.
Once we start moving forward we apply full right lock (turning the wheel as far to the right as it will go)
We'll then hold the wheel steady - moving slowly across the road until we are about a yard (the width of an open car door from the kerb.
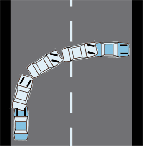
Once we're about a yard from the kerb we need to counter steer (take some of the lock off by steering in the opposite direction) - continue moving slowly and brake gently to a halt about 1foot from the kerb. Apply the handbrake - select neutral and we can then get ready for the reverse phase.
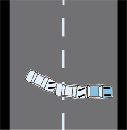
When we are in the reverse phase we need to get moving and then apply full again (this time to the left).
Again we hold this position until we are about a yard from the kerb when we counter steer, taking some of the lock off and braking gently to a halt about one foot from the kerb. Again the car will need to be secured while we get ready for the next phase.
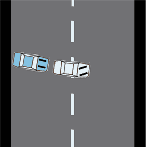
Now we will be able to assess if we can make the turn - if so we'll move slowly forward into the normal driving position facing the new direction. If not we'll have to complete phase 1 and 2 again and then re-assess our position.
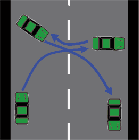
Then we reverse back to get into a position from which we can make the turn. At this point we will be able to judge if the manoeuvre can be completed with one more move which is why the manoeuvre is often referred to as a 3 point turn.
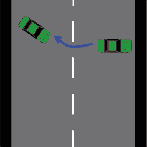
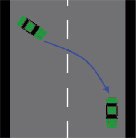
First we move off from the park position and move across to the other side of the road.
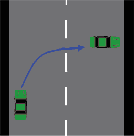
Once there is sufficient room we move forward and take up our position in the new direction.
The Turn in the Road - Introduction
The turn in the road is used when we need to turn the car around and there are no suitable side roads or openings for us to use.
Before you are taught the turn in the road manoeuvre you will be fairly well advanced in your training. You will be familiar with most of the skill elements that are required to complete the exercise successfully.
The diagram shows an outline of the manoeuvre - it appears complicated when you look at it like this - don't worry - it isn't and it's much easier to understand and to do when it is broken down into 3 phases:
Phase 1
Phase 2
Phase 3
Whenever we attempt any manoeuvre we must consider whether it is safe, legal and convenient to perform it as well as ensuring there are no obstructions in the area which might persuade us to find a better location.
Consider the these points and then click on the appropriate heading to see if you are thinking on the right track: